Canon Printer Setup and Installation
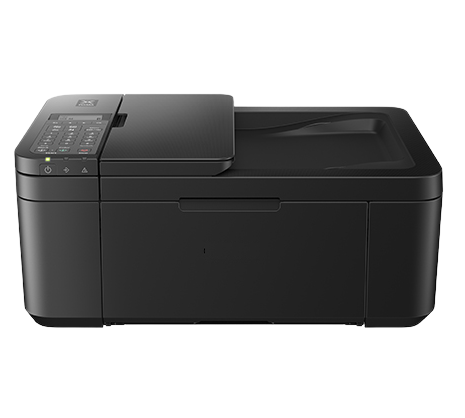
Canon Pixma ix6820 Printer Setup
In this post, we have explained the detailed steps for Canon Pixma iX6820 wireless printer setup on Windows and Mac devices.
Wireless Connection Setup - Canon Pixma ix6820
Take a careful note of the procedural steps for the Canon ix6820 wireless printer setup.
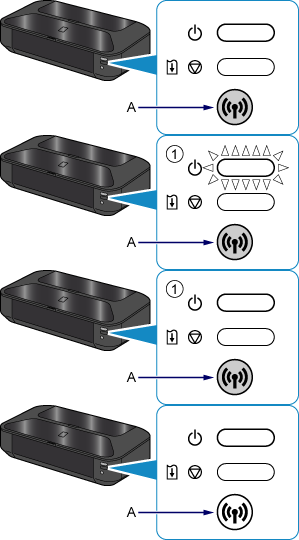
- Ensure that the Canon ix6820 printer is turned on. (Here the white power lamp will be lit.)
- Verify that, button on the access point should be ready to be pressed.
- Here, hold the WiFi button (A) on the printer till the time the white power lamp flashes once. Release the WiFi button after one flash.
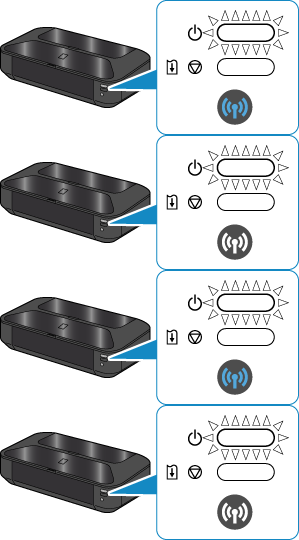
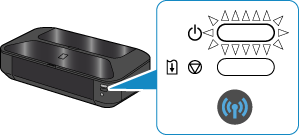
- Ensure that blue WiFi lamp flashes quickly and white power lamp lights up.
- Thereafter, press and hold the button on the access point (within the time span of two minutes.)
- Lastly here user needs to make sure that both blue WiFi lamp and white power lamps are lit.
- Now your wireless network connection setup is complete now.
Still Not able to connect , run our Diagnostic Tool
Canon ix6820 Printer Wireless Setup on Windows
Following steps will guide the user to perform wireless setup of Canon ix6820 printer on Windows.
- Before you start the wireless setup process make sure that the printer, router and windows PC are turned ON.
- Connect your Canon ix6820 printer via the wireless router as already mentioned above.
- Now download the printer driver on your Windows computer by clicking at canon.com/ijsetup
- From the next result choose your printer model and click on the “Download” button.
- Once the downloading process finishes, double click on the driver software package option to open the setup. Thereafter finish the installation process.
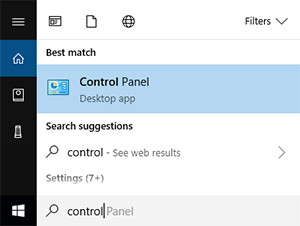
- Open Control panel by clicking windows search option.
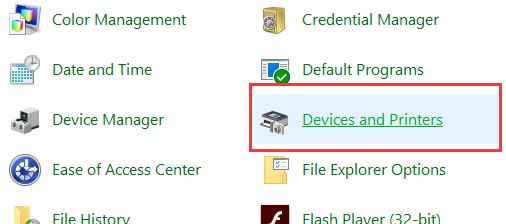
- Select “Devices and Printers” from the window that comes next.
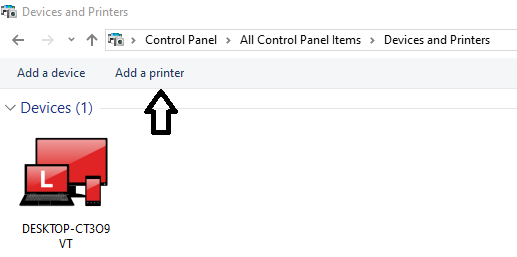
- Now Click on the “Add Printer” section which appear on the left coroner on windows screen. You will see a list of printers, select your printer from list and wait for few moment.
- Once printer is added, it will show in device and printer section. Take a print test now.
Wired connection method (Canon Pixma ix6820)
Take a careful note of the procedural steps for the Canon ix6820 wired connection.
- Ensure that the Canon ix6820 printer is turned on. Here, the white power lamp will be lit.
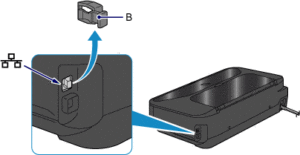
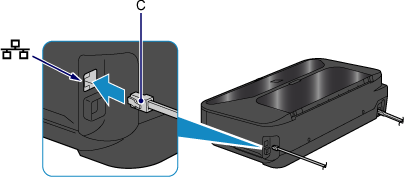
- Here, you will need an ethernet cable. Remove the cap (B) from the upper port that is located on the right side at the back of your Canon Pixma ix6820 printer.
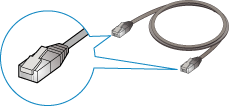
- Now connect the printer and the network device through an ethernet cable (C). Be careful to not to connect it to the USB port.
- Keep pressing the Resume/Cancel button until the time power lamp flashes eleven times. Thereafter, release the Resume/Cancel button after the eleventh flash and your wired connection setup will be completed.
- Now download the printer driver on your Windows computer by visiting the Canon website.
- From the given list, select your printer model and hit on the “Download” option. Once the downloading process finishes, hit the driver package option to open the setup. Thereafter finish the installation process by carefully following the onscreen instructions.
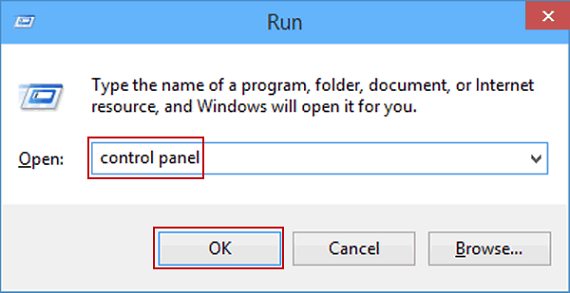
- Now open run dialog box and type in control panel and hit OK button.
- Select “Devices and Printers” from next appearing windows screen.
- Look at the left upper corner and hit “Add printer” option. Now you will be able to see a list of the installed printers.
- Select your model printer and wait for a few seconds.
- Finally your Canon printer will appear in the ‘Devices & Printers’ section and will be ready for use.
Canon ix6820 Printer Wireless Setup on Mac
The following steps will guide the user to perform wireless setup of their Canon ix6820 printer on Mac.
- First of all, ensure that both printer and system are connected to the same network after switching on the printer and the WiFi router.
- Taking the help of the first section of the write up, connect your printer to the WiFi network.
- Now download and install the latest version of the printer driver by visiting the Canon’s website. Follow the on-screen instructions and finish the process of driver download.
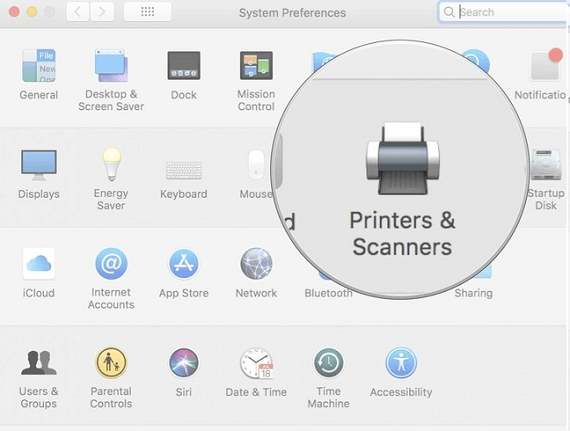
- Go to the Apple menu and then select “System Preferences”.
- Thereafter, click on the “Printers and Scanners” option from the next screen.
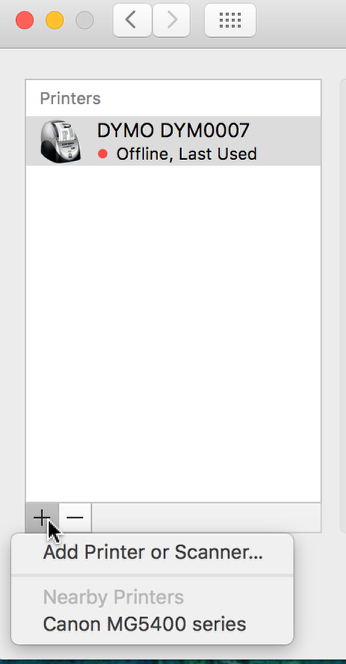
- Click on the “+” sign on the bottom left corner of the prompt screen.
- Select your printer from the drop-down list and wait for few seconds for the connection to get well established.
- Congratulations your Canon ix6820 printer is now connected to the Mac system.
Hope this write-up will benefit the users while setting up their Canon ix6820 printer.
Question's Asked by the People
- With the help of printer’s control panel this reset can by done. This restores all the printer settings to default.
- To do hard reset, remove the printer power cable from power cord.
- Now, remove ethernet cable from the printer (if any connected)
- After that wait for 1 minute again and plugin the printer cable to power cord.
- Turn on the printer and then all the settings will be restored.
- If you want to do it through Control panel, go to the Setup menu, and select Device settings.
- Select reset settings, and press OK.
- Firstly, make sure the printer’s hardware setup is complete.
- Turn on your Printer and Windows PC
- Then, download the most recent version of the driver from the manufacturer’s site.
- Once download is completed, double click on the software package to complete installation and keep following on screen instructions.
- Now connect your printer and PC via USB cable at this moment
- From the Installation process, choose the USB connection type when prompted, and connect your printer and computer.
- Once the connection is established, take a print test to verify the setup.
- Due to network setting issues, weak signal, or improper router settings, your printer might not connect to the WiFi.
- Firstly, make sure that the printer is in ready state
- Keep printer within the reach of the WiFi range.
- Check if the WiFi lamp is lit. If the lamp is off, hold the Resume/Cancel button until the Power lamp flashes 10 times.
- If you are using the Canon IJ Network Tool, select the update option and check if the printer’s name is displayed.
- Make sure that the network settings in the Canon Pixma iX6820 setup are identical with those of the access point.
- If there are using several networks with the same WiFi channel, the signal strength may become weak.
- Go to the router’s web setup page and use the configuration menu to switch to a different channel.
- You can face this issue due to the improper installation or empty cartridges, print settings, or outdated driver.
- Firstly, make sure that your printer is turned ON.
- The Power lamp should flash. Do not proceed until the Power lamp stops flashing.
- If you have used a USB cable for connection, make sure the cable is properly plugged into the printer and the computer.
- Check your cable for any damages and replace it with a new one if required.
- Then, open the ‘Print’ dialog box and ascertain that the printer’s name is chosen.
- Now, go to the printer and driver folder on your PC and choose printer icon and then select the Ports tab and ascertain that the correct port is selected.
- Now, take a print test. If still not able to print then update or reinstall the printer driver and then restart your printer.

